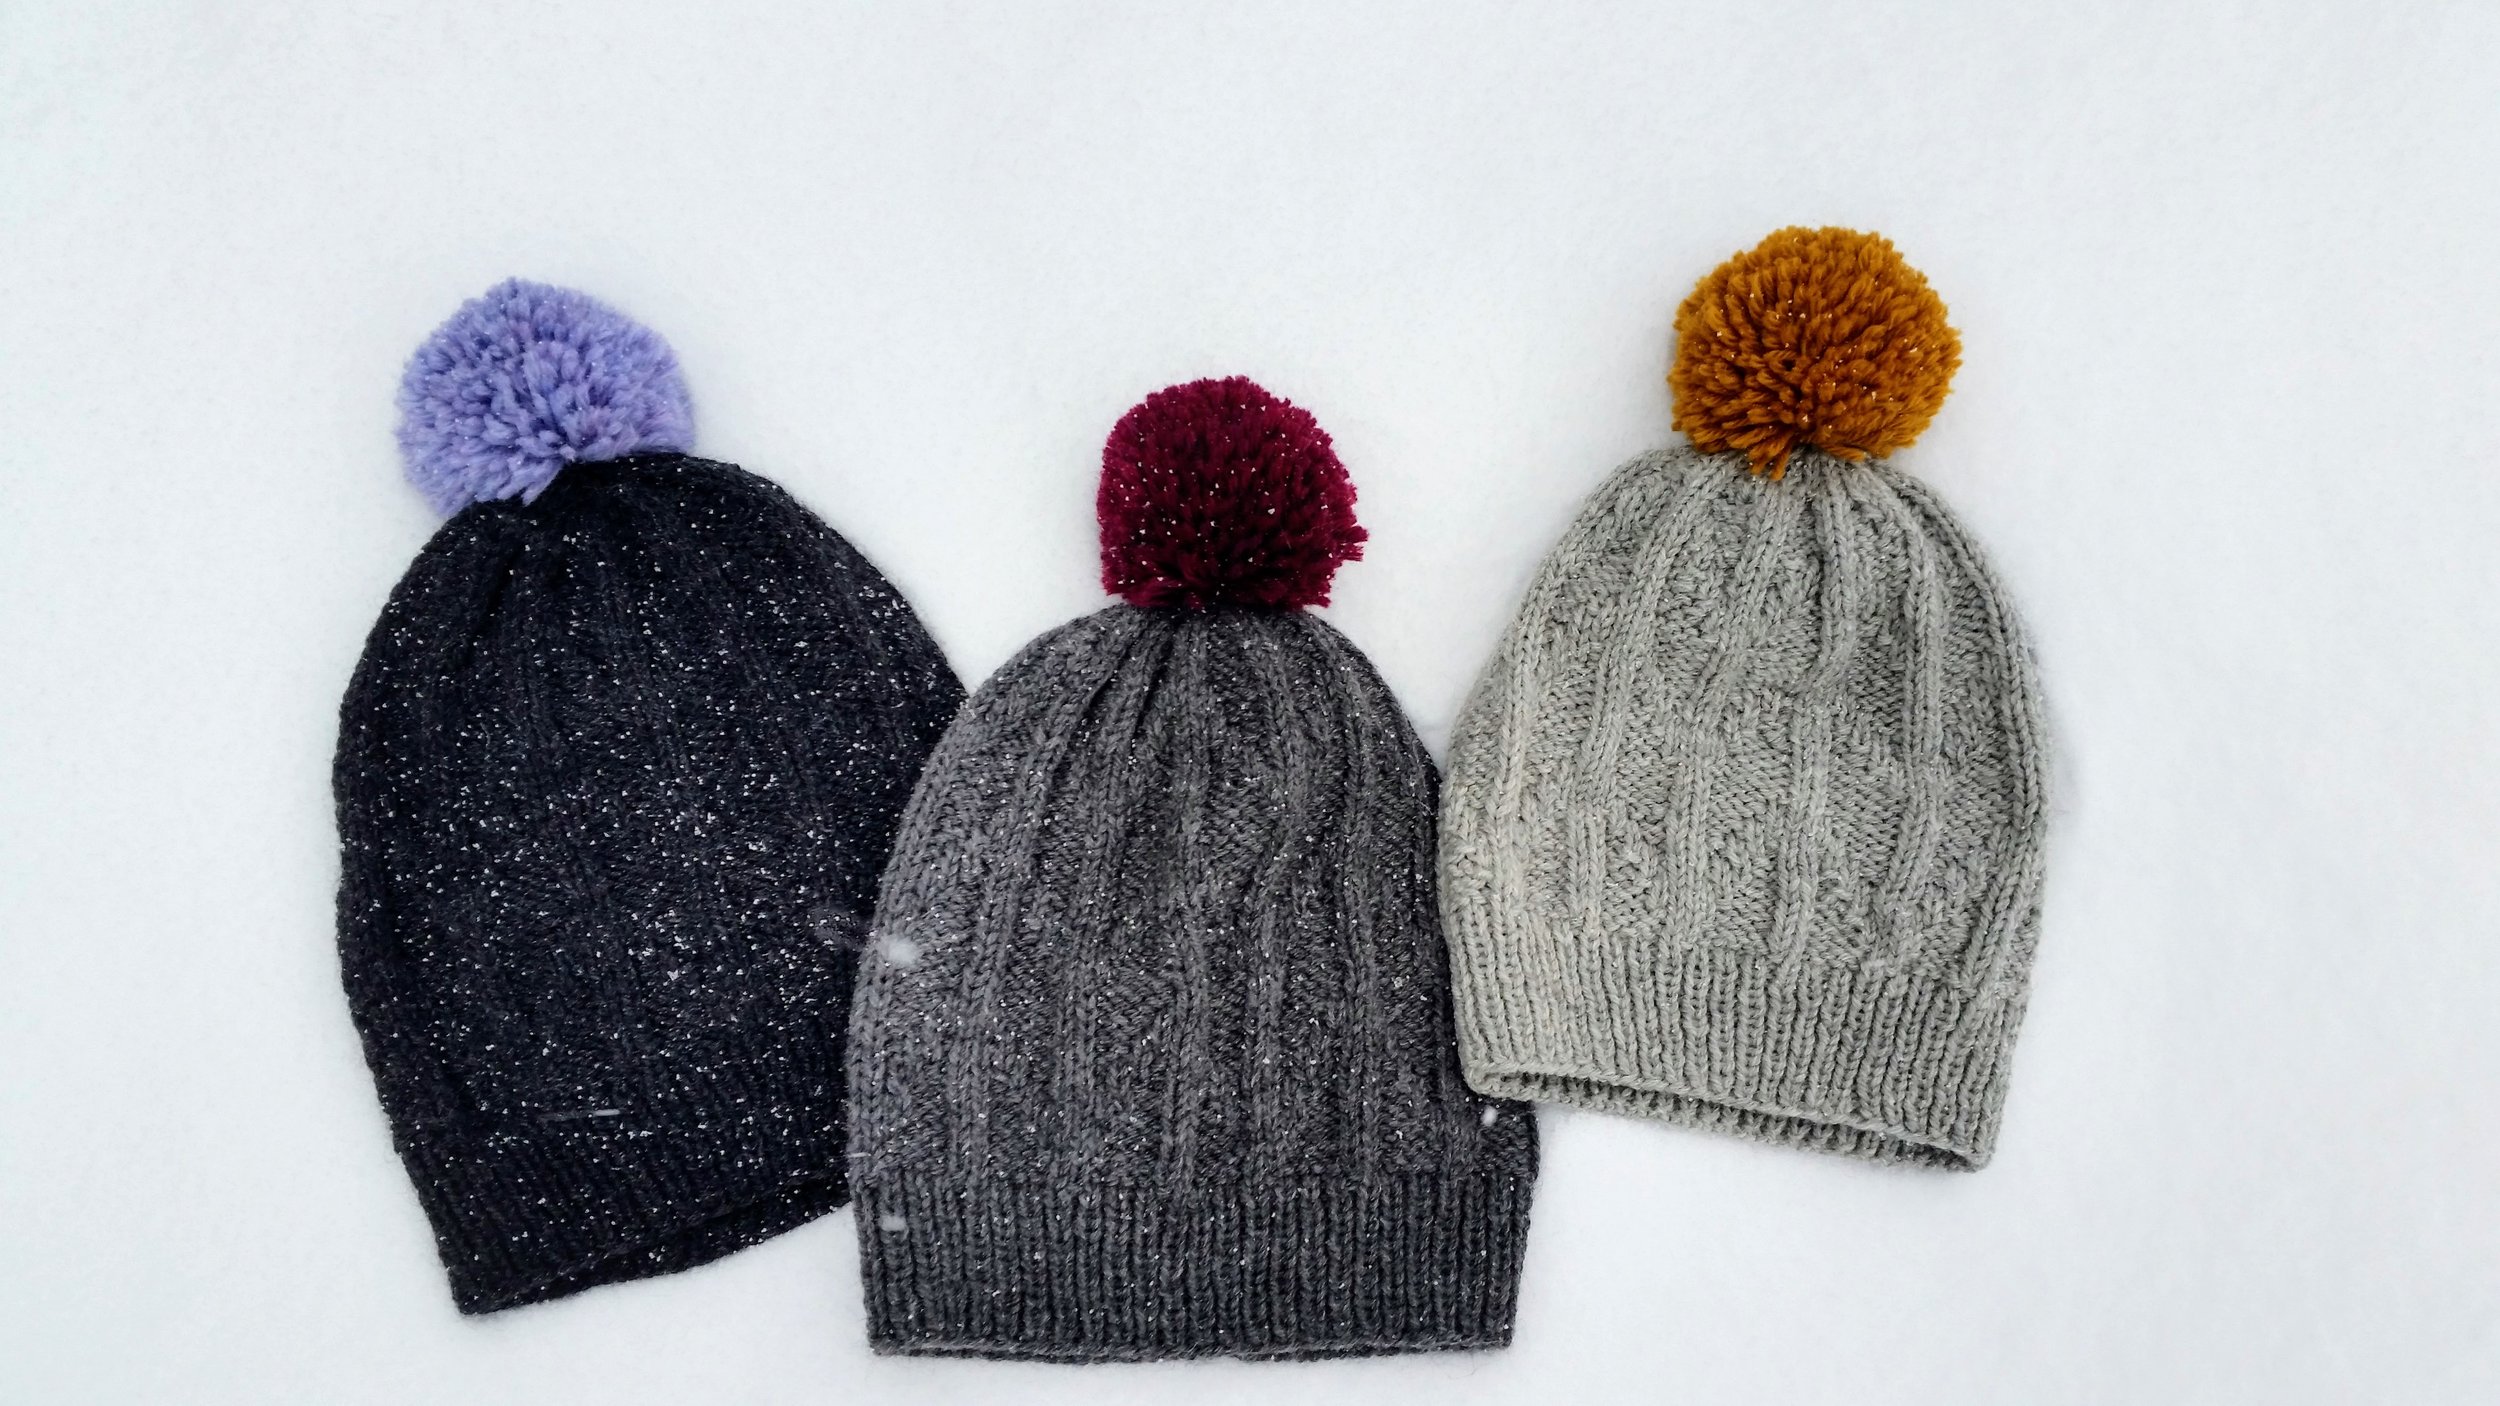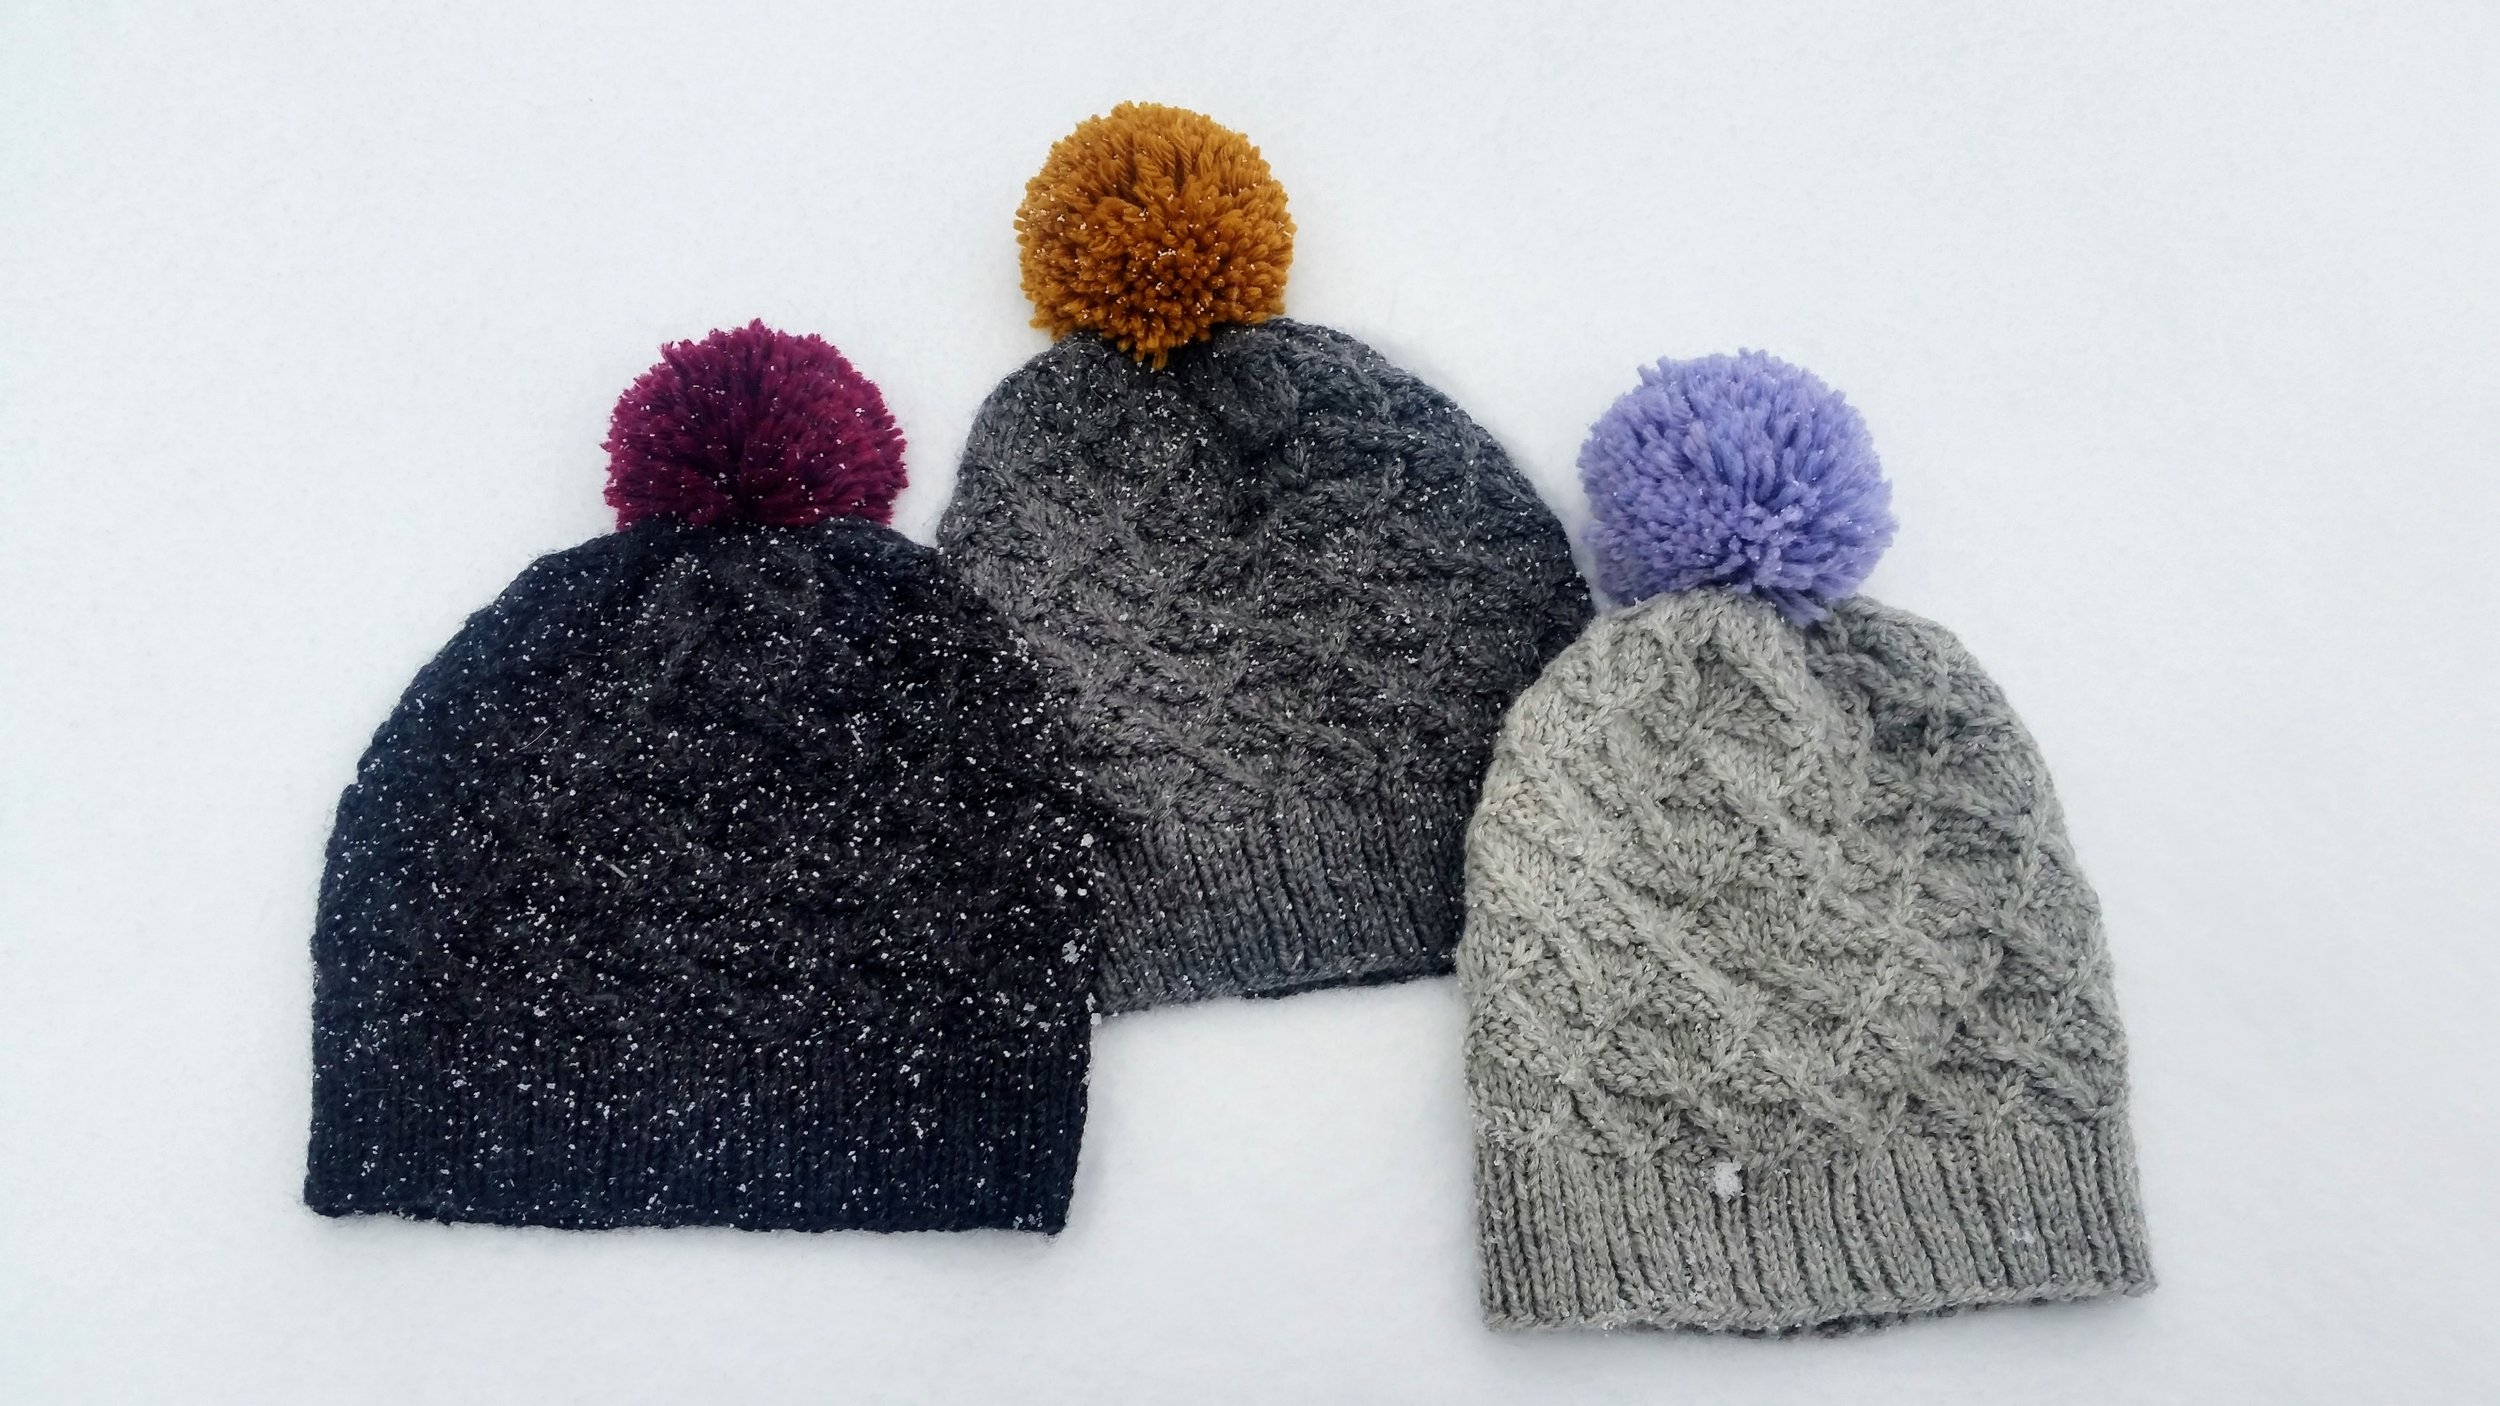
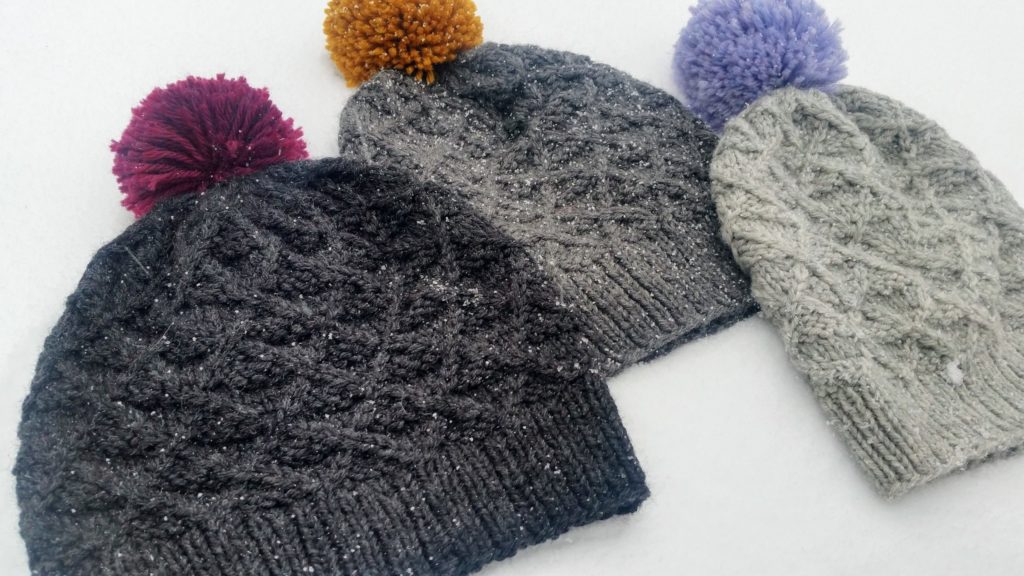
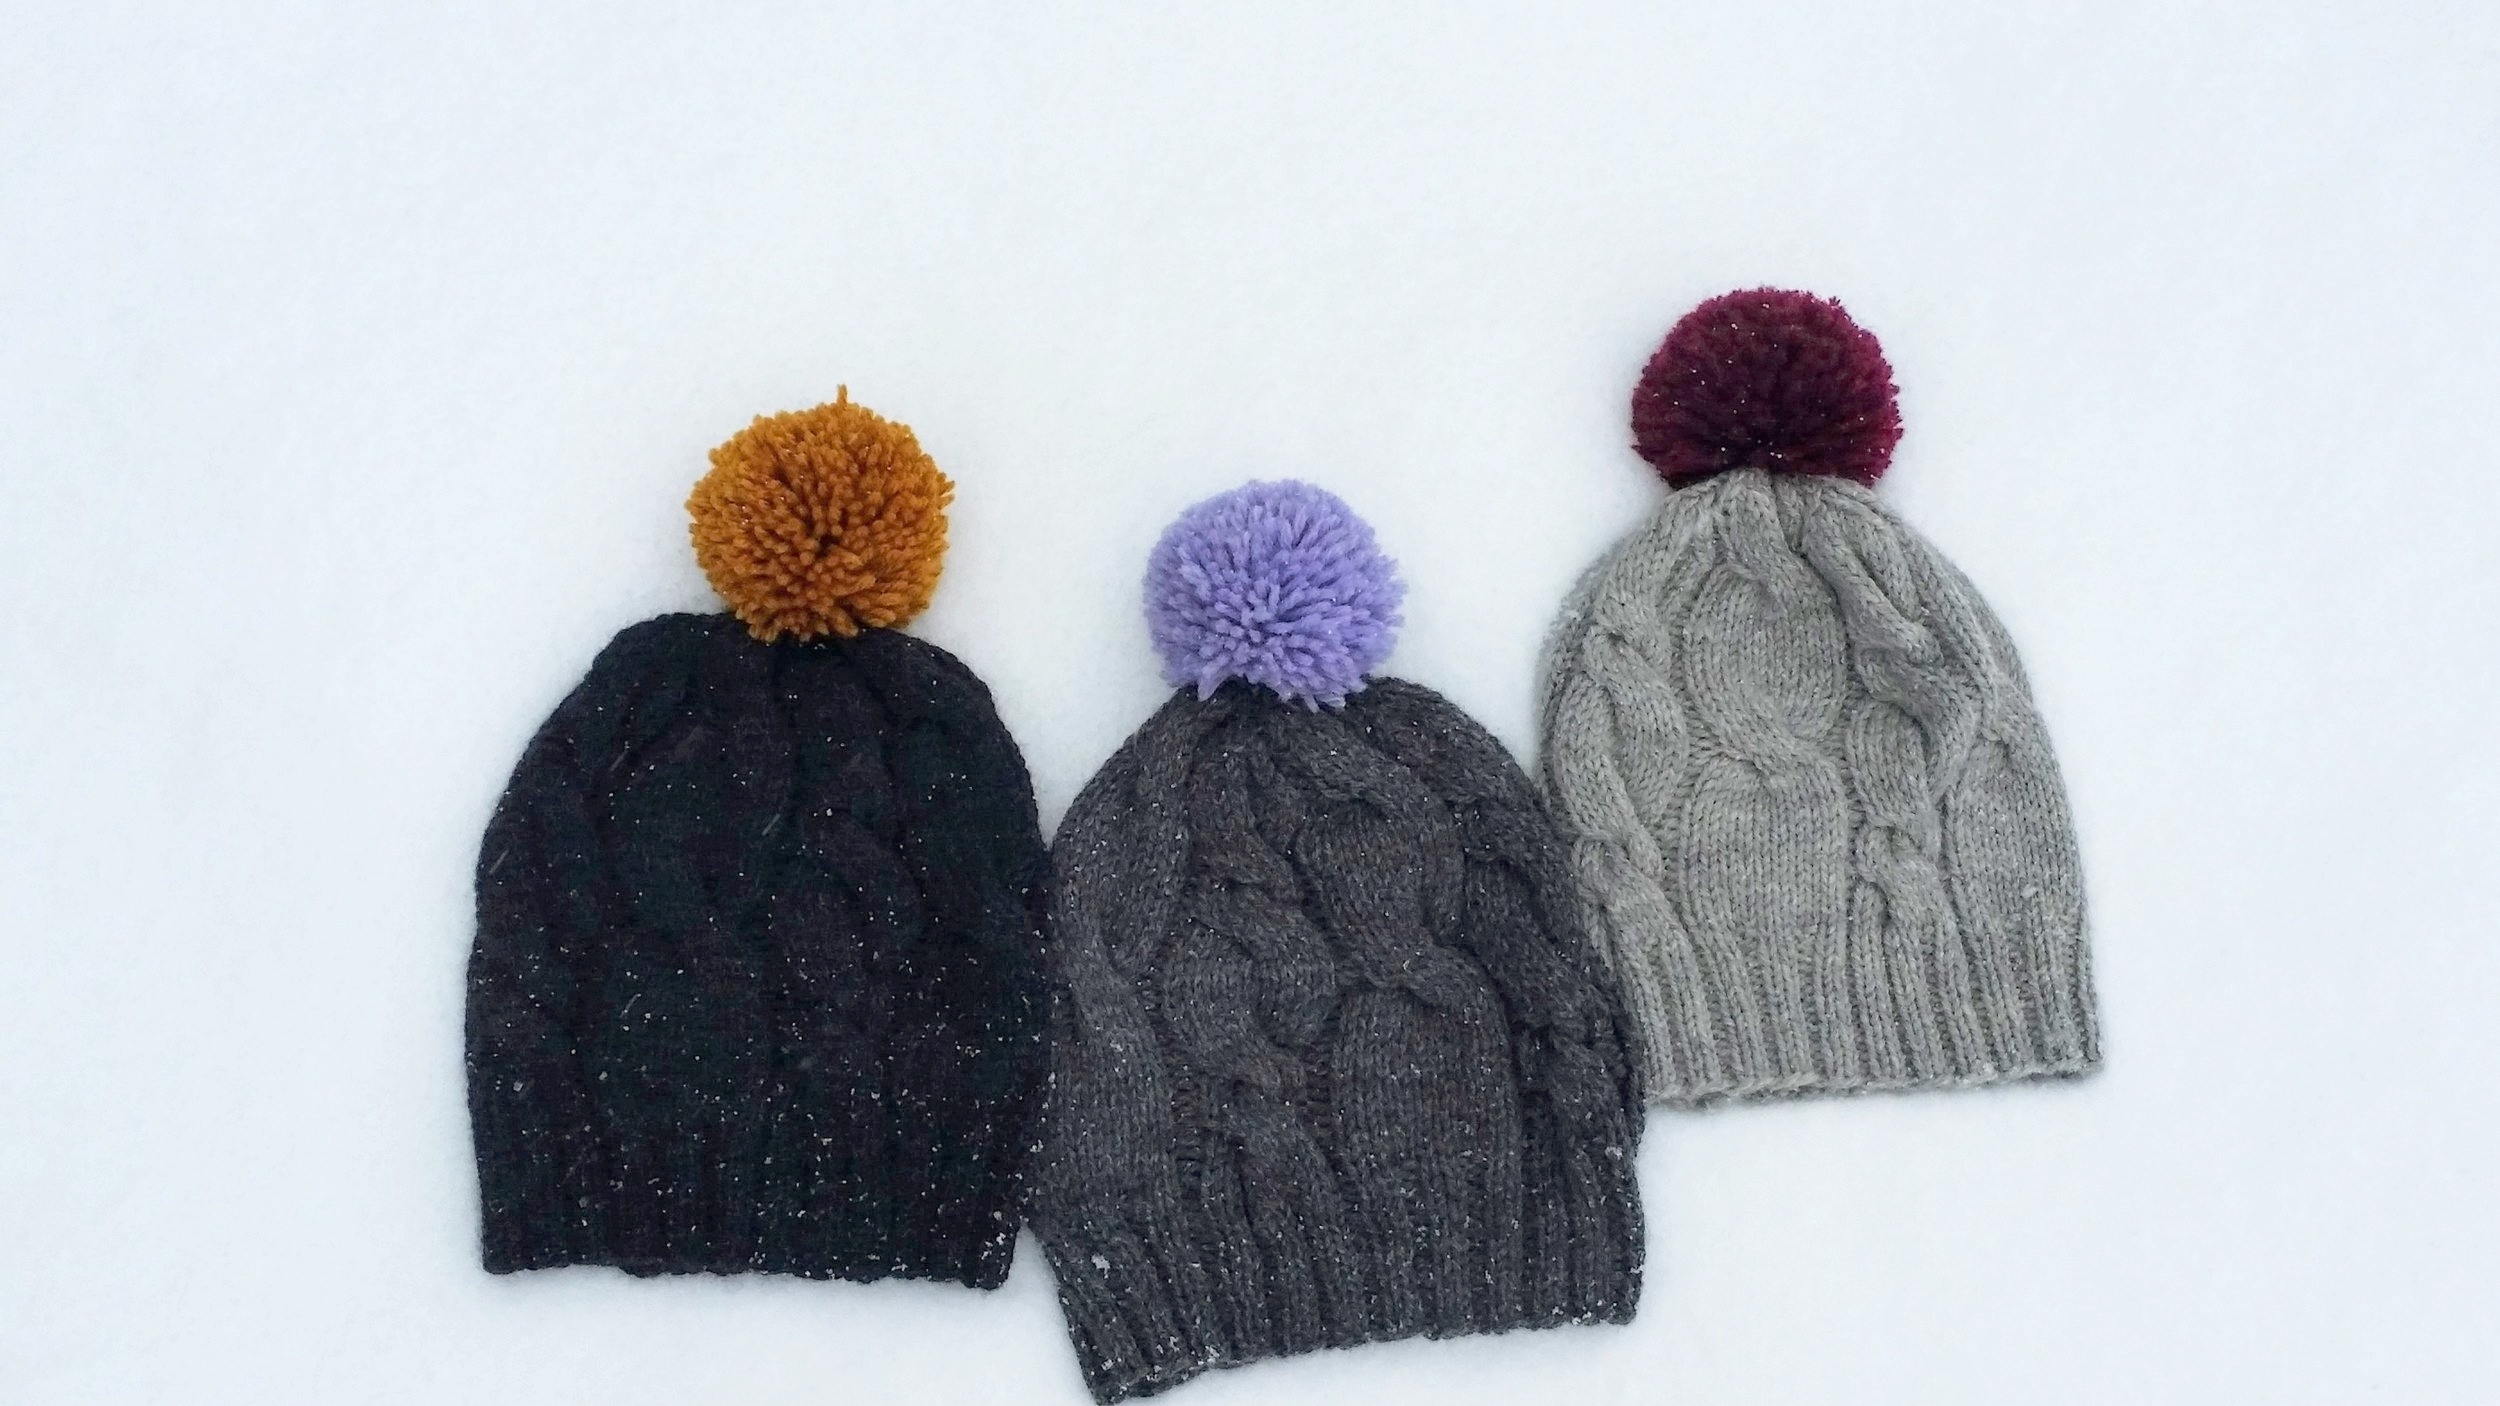
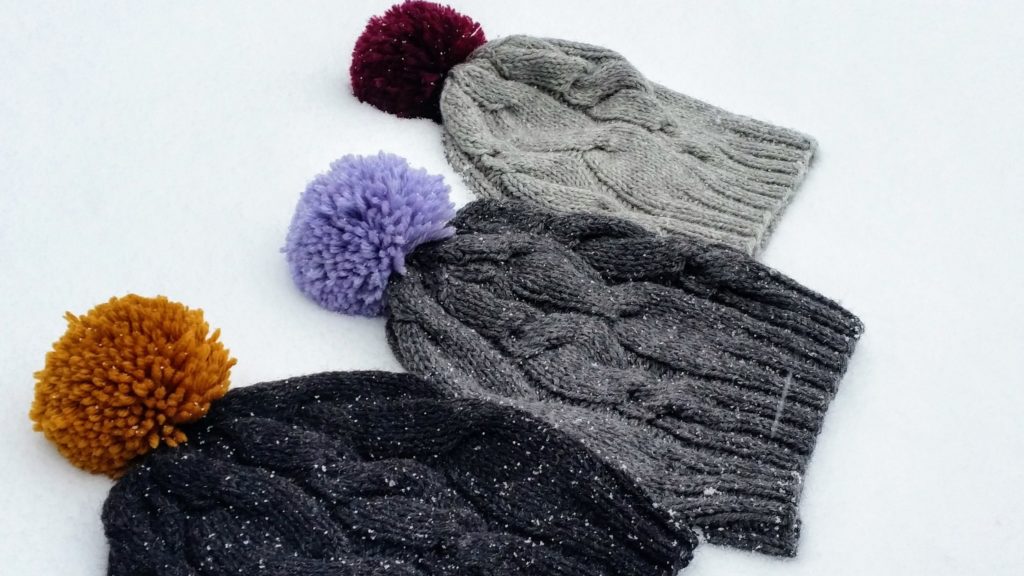
Three grey hats with an argyle knit texture and colourful pom-poms lie in the snow.


Bute is a textured latticework hat inspired by the peaks and valleys of Vancouver’s coastal mountain ranges. Sized to fit a woman’s head and worked with Cascade 220, it’s a quick knit that will keep you warm no matter which of our local hills you’re frolicking around on. 

Finished Dimensions:

17 finished circumference,  will comfortable stretch to fit a head up to 25″ in circumference

This should fit an average woman’s head. For a larger or smaller size, either increase or decrease your cast-on by a multiple of 16 or choose larger/smaller needles to modify your gauge.

Needles:

  • one 16″ circular needle in size needed to obtain gauge (suggested 4.5mm)
  • one 16″ circular needle one size smaller than first needle (suggested 3.5mm)
  • one set double pointed needles in size needed to obtain gauge

Additional Tools:

stitch marker

pom-pom maker

Gauge:

22 stitches per 4 inches in lattice pattern, after blocking

Materials:

  • 143 yards of worsted weight yarn (1 ball Cascade 220 shown here in Jet, Charcoal Grey, and Silver Grey)
  • optional 33 yards of contrasting worsted weight yarn for pom-pom (1 ball Cascade 220 shown here in Straw, Lavender Heather, and Nebula Heather)

Abbreviations:

K: knit

P: purl

C1F: slip one stitch to cable needle, hold in front of work, knit one, knit one from cable needle (left leaning cable)

C1B: slip one stitch to cable needle, hold behind work, knit one, knit one from cable needle (right leaning cable)

K2tog: knit two together (right leaning decrease)

SSK: slip slip knit (left leaning decrease)

P2tog: purl two together

Special Instructions:

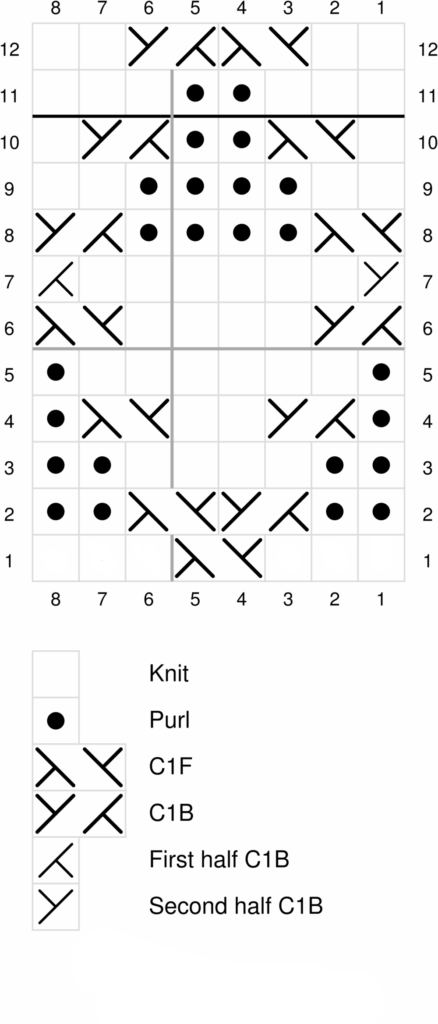
To keep the lattice running continuously around the circumference of the hat, pay special attention to the transition between the last C1F on Row 6 of the pattern and the first C1B on row 7 especially if you are working solely from the chart; the second to last stitch of Row 6 will be a part of both of these cables and thus requires the following steps once you reach this point. Once you come to the last two stitches of Row 6:

  1. slip 1 stitch to cable needle and hold in front of work
  2. knit 1 (this was originally the last stitch of Row 6)
  3. remove beginning of round marker
  4. move cable needle to back of work
  5. knit first stitch of Row 7 (this now becomes the last stitch of Row 6)
  6. place marker
  7. knit one from cable needle (this now becomes the first stitch of Row 7)

When you reach the end of Row 7, the last stitch was already crossed over as part of this transition so you can knit the last 7 stitches before the marker and continue on with Row 8 as normal. These instructions are included within the written pattern in slightly less detail than above. If this seems convoluted, try to think of it as a braid.
Brim:

Using smaller needles, cast-on 96 stitches. Place marker and join to work in the round, being careful not to twist. Work 15 rows of modified rib.

Modified rib: *K2, P1, K2, P1, K1, P1 repeat from * to end of round

Body:

Switch to larger needles and work rows 1-12 three times:

Row 1: *K3, C1F, K3 repeat from * to end of round 

Row 2: *P2, C1B, C1F, P2 repeat from * to end of round

Row 3: *P2, K4, P2 repeat from * to end of round

Row 4: *P1, C1B, K2, C1F, P1 repeat from * to end of round

Row 5: *P1, K6, P1 repeat from * to end of round

Row 6: *C1B, K4, C1F repeat from * to 2 stitches before end of round. Place next stitch on cable needle and hold in front, K1, remove marker, move cable needle to back of work, K1, place marker

Row 7: K1 from cable needle, K6, *C1B, K6 repeat from * to 1 stitches before end of round, K1

Row 8: *C1F, P4, C1B repeat from * to end of round

Row 9: *K2, P4, K2 repeat from * to end of round

Row 10: *K1, C1F, P2, C1B, K1 repeat from * to end of round

Row 11: *K3, P2, K3 repeat from * to end of round

Row 12: *K2, C1F, C1B, K2 repeat from * to end of round

Work rows 1-6 one more time
Crown:

Continue working in the round, switching to DPNs once the decreases cause the circumference of the hat to become too small to continue on your circular needles.

Row 1: K1 from cable needle *SSK, K2, K2tog, C1B, K6, C1B repeat from * to 1 stitch before end of round ending after K6, K1 (12 stitches decreased, 84 stitches remain)

Row 2: *C1F, P2, C1B, C1F, P2tog twice, C1B repeat from * to end of round (12 stitches decreased, 72 stitches remain)

Row 3: *K2, P2tog, K4, P2tog, K2 repeat from * to end of round (12 stitches decreased, 60 stitches remain)

Row 4: *K1, K2tog, K4, SSK, K1 repeat from * to end of round (12 stitches decreased, 48 stitches remain)

Row 5: *K2tog repeat from * to end of round (24 stitches decreased, 24 stitches remain)

Row 6: *K2tog repeat from * to end of round (12 stitches decreased, 12 stitches remain)

Row 7: *K2tog repeat from * to end of round (6 stitches decreased, 6 stitches remain)

Cut working yarn and thread it through remaining stitches to bind off. Make sure to block your hat to help it have a soft drape, I would recommend shaping it around something round like a bowl to give it some shape. Then weave in ends and attach the optional pom-pom and you’re ready to go!

RAVELRY LINK

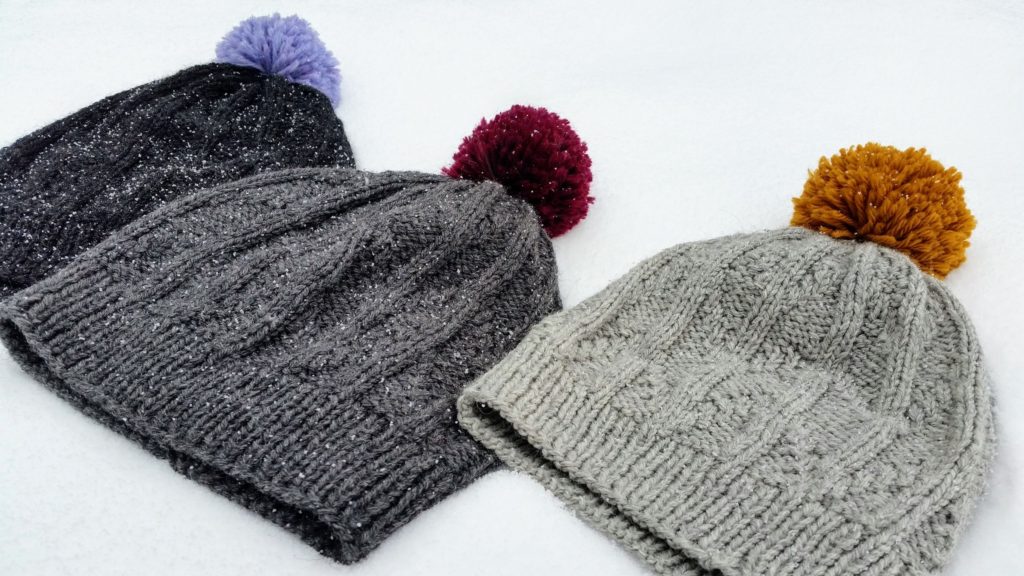
Three grey hats with alternating knit cables and colourful pom-poms lie in the snow.


Davie’s alternating cables are representative of the Vancouver shoreline and the various ebbs and flows that make up our day to day lives. Sized to fit a woman’s head and worked with Cascade 220, it’s a quick knit that will keep you warm during walks along the seawall and windy trips to the dog beach.

Finished Dimensions:

16″ finished circumference, will comfortable stretch to fit a head up to 25″ in circumference

This should fit an average woman’s head. For a larger or smaller size, either increase or decrease your cast-on by a multiple of 24 or choose larger/smaller needles to modify your gauge.

Needles:

  • one 16″ circular needle in size needed to obtain gauge (suggested 4.5mm)
  • one 16″ circular needle one size smaller than first needle (suggested 3.5mm)
  • one set double pointed needles in size needed to obtain gauge

Additional Tools:

stitch marker

pom-pom maker

Gauge:

24 stitches per 4 inches in cable pattern, after blocking

Materials:

  • 137 yards of worsted weight yarn (1 ball Cascade 220 shown here in Jet, Charcoal Grey, and Silver Grey)
  • optional 33 yards of contrasting worsted weight yarn for pom-pom (1 ball Cascade 220 shown here in Straw, Lavender Heather, and Nebula Heather)

Abbreviations:

K: knit

P: purl

C10F: slip 5 stitches onto cable needle and hold in front of work, knit 5 stitches from left needle, knit 5 stitches from cable needle (left leaning cable)

K2tog: knit two together (right leaning decrease)

SSK: one by one slip the next two stitches knitwise onto right needle, put them back onto left needle and k2tog (left leaning decrease)

P2tog: purl two together

P3tog: purl 3 together

Brim:

Using smaller needles, cast on 96 stitches. Place marker and join to work in the round, being careful not to twist. Work 15 rows of ribbing

Rib: *K2, P2 repeat from * to end of round

Body:

Switch to larger needles and work rows 1-18 two times:

Row 1-5: *K10, P2, K10, P2 repeat from * to end of round

Row 6: *K10, P2, C10F, P2 repeat from * to end of round

Row 7-11: *K10, P2, K10, P2 repeat from * to end of round

Row 12: *K10, P2, C10F, P2 repeat from * to end of round

Row 13-17: *K10, P2, K10, P2 repeat from * to end of round

Row 18: *C10F, P2, K10, P2 repeat from * to end of round

Crown:

Continue working in the round, switching to DPNs once the decreases cause the circumference of the hat to become too small to continue on your circular needles.

Row 1: *SSK, K6, K2tog, P2, K10, P2 repeat from * to end of round (8 stitches decreased, 88 stitches remain)

Row 2: *SSK, K4, K2tog, P2, K10, P2 repeat from * to end of round (8 stitches decreased, 80 stitches remain)

Row 3: *SSK: K2, K2tog, P2, K10, P2 repeat from * to end of round (8 stitches decreased, 72 stitches remain)

Row 4: *SSK, K2tog, P2tog, K10, P2tog repeat from * to end of round (12 stitches decreased, 60 stitches remain)

Row 5: *K2tog, P1, SSK, K6, K2tog, P1 repeat from * to end of round (12 stitches decreased, 48 stitches remain)

Row 6: *K1, P1, SSK, K4, K2tog, P1 repeat from * to end of round (8 stitches decreased, 40 stitches remain)

Row 7: *P3tog, SSK, K2, P2tog repeat from * to end of round (16 stitches decreased, 24 stitches remain)

Row 8: *K2tog repeat from * to end of round (12 stitches decreased, 12 stitches remain)

Cut working yarn and thread it through remaining stitches to bind off. Make sure to block your hat to help it have a soft drape, I would recommend shaping it around something round like a bowl to give it some shape. Then weave in ends and attach the optional pom-pom and you’re ready to go!
RAVELRY LINK

Three grey hats with a knit chevron texture and colourful pom-poms lie in the snow.

Thurlow’s ribbed chevron motif is inspired by the trees that line Vancouver’s streets and fill its surrounding forests. Sized to fit a woman’s head with a bit of slouch and worked with Cascade 220, it’s a quick knit that will keep you warm as this year’s long cold winter drags on.

Finished Dimensions:

17″ finished circumference, will comfortable stretch to fit a head up to 24″ in circumference

This should fit an average woman’s head with a bit of slouch. If you’d like a snug fit, I’d recommend adding a few extra rows of ribbing at the beginning and folding the brim up. For a larger or smaller size, either increase or decrease your cast-on by a multiple of 14 or choose larger/smaller needles to modify your gauge.

Needles:

  • one 16″ circular needle in size needed to obtain gauge (suggested 4.5mm)
  • one 16″ circular needle one size smaller than first needle (suggested 3.5mm)
  • one set double pointed needles in size needed to obtain gauge

Additional Tools:

stitch marker

pom-pom maker

Gauge:

22 stitches per 4 inches in chevron pattern, after blocking

Materials:

  • 145 yards of worsted weight yarn (1 ball Cascade 220 shown here in Jet, Charcoal Grey, and Silver Grey)
  • optional 33 yards of contrasting worsted weight yarn for pom-pom (1 ball Cascade 220 shown here in Straw, Lavender Heather, and Nebula Heather)

Abbreviations:

K: knit

P: purl

K2tog: knit two together (right leaning decrease)

SSK: slip slip knit (left leaning decrease)

P2tog: purl two together

Brim:

Using smaller needles, cast-on 98 stitches. Place marker and join to work in the round, being careful not to twist. Work 15 rows of ribbing (if you’d like a hat that fits more snugly I would recommend knitting an extra 3-5 rows of ribbing so you can fold the brim up.)

Rib: *K1, P1 repeat from * to end of round

Body:

Switch to larger needles and work rows 1-14 three times:

Row 1 & 2: *K1, P5, K2, P5, K1 repeat from * to end of round

Row 3 & 4: *K2, P4, K2, P4, K2 repeat from * to end of round

Row 5 & 6: *K3, P3, K2, P3, K3 repeat from * to end of round

Row 7 & 8: *K1, P1, K2, P2, K2, P2, K2, P1, K1 repeat from * to end of round

Row 9 & 10: *K1, P2, K2, P1, K2, P1, K2, P2, K1 repeat from * to end of round

Row 11 & 12: *K1, P3, K6, P3, K1 repeat from * to end of round

Row 13 & 14: *K1, P4, K4, P4, K1 repeat from * to end of round

Crown:

Continue working in the round, switching to DPNs once the decreases cause the circumference of the hat to become too small to continue on your circular needles.

Row 1: *K1, P2tog, P3, K2, P3, P2tog, K1 repeat from * to end of round (14 stitches decreased, 84 stitches remain)

Row 2: *K1, P4, K1 repeat from * to end of round

Row 3: *K1, P2tog, P2, K2, P2, P2Tog, K1 repeat from * to end of round (14 stitches decreased, 70 stitches remain)

Row 4: *K1, P3, K1 repeat from * to end of round

Row 5: *K1, P2tog, P1, K2, P1, P2tog, K1 repeat from * to end of round (14 stitches decreased, 56 stitches remain)

Row 6: *K1, P2, K1 repeat from * to end of round

Row 7: *SSK, K2tog repeat from * to end of round (28 stitches decreased, 28 stitches remain)

Row 8: K to end of round

Row 9: *K2tog, K1 repeat from * until two stitches remain, K2tog (10 stitches decreased, 18 stitches remain)

Row 10: K2tog to end of round (9 stitches decreased, 9 stitches remain)

Cut working yarn and thread it through remaining stitches to bind off. Make sure to block your hat to make the ribbing lie flat and reveal the chevron texture. Then weave in ends and attach the optional pom-pom and you’re ready to go!

RAVELRY LINK